
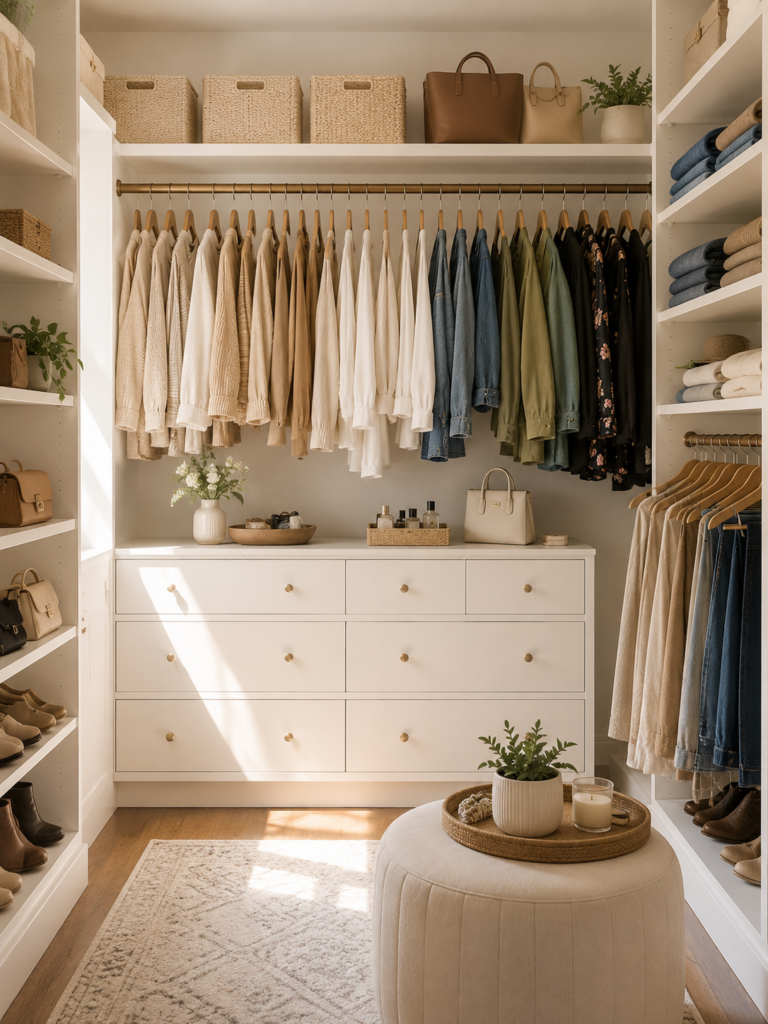
A well-organized closet can make your entire morning routine easier.
When everything has a designated place, you can find your favorite clothes quickly, see what you actually own, and avoid the frustration of digging through crowded shelves or overflowing drawers.
The challenge isn’t just how to organize your closet. It’s how to create a system that’s simple enough to maintain.
The good news is that you don’t need a huge walk-in closet or expensive custom storage. With thoughtful decluttering, smart organization, and a few practical storage solutions, you can turn even a small, crowded closet into a functional space.
In this guide, we’ll walk you through the process step by step—and show you how to keep your closet organized long after the initial makeover.
Why Closet Organization Matters
An organized closet isn’t just about appearance.
A good system can help you:
- Find clothes faster
- Make better use of available space
- Reduce unnecessary purchases
- Protect your clothing
- Simplify your morning routine
- Keep your bedroom less cluttered
- Identify items you no longer wear
- Make seasonal changes easier
The goal isn’t to create a picture-perfect closet.
The goal is to create a closet that works effortlessly for your everyday life.
Step 1: Empty Your Closet
The best way to organize a closet is to start with a clean slate.
Remove everything you can, including:
- Clothes
- Shoes
- Bags
- Accessories
- Storage boxes
- Seasonal items
- Items stored on the floor
Place everything somewhere you can see it clearly.
This may temporarily make your bedroom look messier, but it allows you to understand exactly how much you own.
Why this works
It’s difficult to organize clutter when you can’t see the full collection.
Once everything is outside the closet, you can make better decisions about what should go back in.
Step 2: Clean the Closet Before Reorganizing
Don’t put everything back immediately.
Take advantage of the empty space to clean it thoroughly.
Clean:
- Shelves
- Hanging rods
- Drawers
- Corners
- Closet floor
- Doors and handles
Vacuum or sweep the floor and wipe down hard surfaces.
This is also a good opportunity to check for signs of moisture, pests, or damage that could affect your clothing.
Step 3: Sort Everything Into Categories
Now it’s time to sort.
Create broad categories such as:
- T-shirts
- Shirts
- Blouses
- Trousers
- Jeans
- Dresses
- Skirts
- Jackets
- Sportswear
- Sleepwear
- Underwear
- Shoes
- Bags
- Accessories
Don’t worry about making the categories perfect.
The purpose is to group similar items together so you can see what you have.
Step 4: Declutter Before You Organize
This is one of the most important steps.
Don’t buy storage products yet.
First, decide what you’re actually keeping.
For every item, ask:
- Does it fit?
- Do I wear it?
- Is it comfortable?
- Is it in good condition?
- Does it suit my current lifestyle?
- Would I choose it again today?
If the answer is consistently no, consider donating, selling, recycling, or disposing of it appropriately.
Step 5: Use the Keep, Donate, Sell, Discard System
A simple four-category system makes decluttering easier.
Keep
Items you wear regularly, need, or genuinely value.
Donate
Good-quality items you no longer need that could be useful to someone else.
Sell
Higher-value items that are in good condition and worth the effort of selling.
Discard or Recycle
Items that are damaged, worn out, or unsuitable for reuse.
Try not to create a huge “maybe” pile.
If you need more time to decide, put those items in a clearly labeled box and set a specific date to review them.
Step 6: Separate Seasonal Clothing
If your closet is small, you don’t necessarily need every season’s clothing taking up prime storage space.
Consider rotating clothing based on the season.
During warmer months
Keep lightweight clothing easily accessible.
Move heavy coats, sweaters, and winter accessories into appropriate storage.
During colder months
Reverse the process.
Storage options include:
- Under-bed containers
- Vacuum storage bags where appropriate
- High closet shelves
- Storage boxes
- Suitcases
Always make sure clothing is clean and completely dry before long-term storage.
Step 7: Choose the Right Hangers
Hangers may seem like a small detail, but they can make a significant difference.
Choose hangers that are:
- Consistent in style
- Appropriate for your clothing
- Slim enough to maximize space
- Strong enough to support heavier garments
Slim hangers can help increase hanging capacity compared with bulky designs.
However, avoid forcing too many clothes onto a single rod.
Your clothing should still be easy to remove and return.
Step 8: Organize Clothes by Category
Once you’ve decided what you’re keeping, create clear categories.
For example:
Hanging section:
- Dresses
- Jackets
- Shirts
- Blouses
- Trousers
Folded section:
- T-shirts
- Jeans
- Sweaters
- Loungewear
Drawers:
- Underwear
- Socks
- Smaller accessories
Grouping similar items together makes it much easier to find what you need.
Step 9: Choose an Organization System
There are several ways to arrange clothing.
By Category
Keep similar clothing together.
Example:
Shirts → T-shirts → Trousers → Dresses
This is one of the easiest systems to maintain.
By Color
Arrange similar categories from light to dark or by color family.
This creates a visually clean appearance and makes certain items easier to find.
By Frequency of Use
Keep everyday clothing at eye level and occasional items higher or farther back.
Best approach?
For most people, category first, then color works particularly well.
For example:
- White shirts
- Blue shirts
- Black shirts
- Neutral shirts
The important thing is consistency.
Step 10: Fold Clothes Efficiently
Not every item needs to be hung.
Fold items that can easily stretch or lose their shape on hangers.
Good candidates include:
- T-shirts
- Sweaters
- Jeans
- Sweatshirts
- Casual trousers
For drawers, consider folding clothes vertically rather than stacking them in very tall piles.
This allows you to see more items at once.
Step 11: Use Drawer Dividers
Small clothing items can quickly become messy inside drawers.
Drawer dividers can help separate:
- Underwear
- Socks
- Belts
- Scarves
- Accessories
You don’t necessarily need expensive organizers.
Simple adjustable dividers or small boxes can create useful compartments.
The key principle
Give each category its own space.
When everything has a designated section, maintaining the drawer becomes much easier.
Step 12: Make Use of Vertical Space
If your closet has unused space above your clothes, take advantage of it.
Consider:
- Stackable shelves
- Shelf dividers
- Hanging organizers
- High storage boxes
- Additional shelving
Use higher shelves for items you don’t need every day.
Keep your most frequently used clothing within easy reach.
Step 13: Organize Shoes Properly
Shoes can consume a surprising amount of closet space.
Instead of leaving them scattered on the floor, choose a dedicated storage solution.
Options include:
- Shoe racks
- Shoe shelves
- Clear boxes
- Pull-out organizers
- Over-the-door organizers
Keep frequently worn shoes easily accessible.
Store formal or seasonal footwear in less accessible areas.
Pro tip
Before storing shoes for a long period, clean and dry them properly.
Step 14: Create a Dedicated Space for Bags
Handbags, backpacks, and other bags can quickly become cluttered.
Use:
- Hooks
- Shelf dividers
- Dedicated shelves
- Hanging organizers
- Storage bins
Avoid piling delicate bags under heavy items, as this can cause them to lose their shape.
For structured bags, storing them upright with light internal support can help maintain their form.
Step 15: Organize Accessories
Accessories are small, but they can create a lot of clutter.
Create dedicated areas for:
- Belts
- Scarves
- Jewelry
- Hats
- Sunglasses
- Watches
Wall hooks, drawer organizers, small trays, and hanging accessories organizers can all help.
Keep frequently used accessories where they’re easy to reach.
Step 16: Use the Floor Strategically
Your closet floor shouldn’t automatically become a storage area.
Keep it as clear as possible.
A small shoe rack or a few carefully selected storage containers can be useful, but avoid creating piles.
An open floor makes the closet easier to clean and gives the entire space a more organized appearance.
Step 17: Label Storage Boxes
If you use boxes or bins, labels can make a big difference.
Instead of opening every container to find something, label them clearly.
For example:
- Winter Clothes
- Travel Items
- Accessories
- Extra Bedding
- Formal Wear
- Seasonal Shoes
This is especially useful when storing items on high shelves.
Step 18: Keep Everyday Items at Eye Level
Your closet should reflect your daily routine.
Keep your most frequently used items in the easiest-to-reach areas.
Eye level:
Everyday clothing.
Lower shelves:
Shoes and heavier items.
Higher shelves:
Seasonal or occasional items.
Back storage:
Items you rarely use.
This simple system makes your closet much more efficient.
Step 19: Leave Some Empty Space
Don’t fill every available inch.
A closet needs a little breathing room.
Empty space makes it easier to:
- See your clothing
- Remove items
- Put things away
- Clean shelves
- Add or replace items
If you have to force clothes into a drawer or push hangers along the rod, you probably have too much in that category.
Step 20: Create a “Wear Again” Area
One common reason bedrooms become messy is clothing that has been worn once but isn’t ready for the laundry.
Instead of throwing these items over a chair or on the floor, create a designated area.
You could use:
- A small hook
- A valet hook
- A dedicated section of the closet
- A clothing rack
The rule is simple:
If it’s not dirty enough for the laundry but not clean enough to return to the closet, it goes in the designated area.
This prevents the famous “chair pile.”
How to Organize a Small Closet
A small closet requires more careful use of space.
Start with the biggest space-saving opportunities.
Try:
- Slim hangers
- Vertical shelf dividers
- Drawer organizers
- Door-mounted storage
- Under-bed storage
- Seasonal rotation
- Multi-purpose organizers
- Clear storage boxes for occasional items
Avoid overcrowding the hanging rod.
Sometimes removing clothing is more effective than adding another organizer.
How to Organize a Walk-In Closet
A walk-in closet provides more space, but it can still become cluttered.
Divide it into zones.
Zone 1: Everyday clothing
Keep frequently worn clothes within easy reach.
Zone 2: Shoes
Create a dedicated shoe area.
Zone 3: Accessories
Use drawers, trays, or organizers.
Zone 4: Seasonal storage
Place occasional items higher or farther back.
Zone 5: Special occasion clothing
Store formal or rarely worn pieces separately.
The goal is to make the closet feel like a collection of small, functional zones rather than one large storage area.
How to Keep Your Closet Organized
Organizing your closet once isn’t enough.
The key is creating simple habits.
Use the One-In, One-Out Rule
When you buy a new item, consider removing a similar item you no longer need.
For example:
New pair of jeans → review an older pair.
New sweater → donate one you rarely wear.
This helps prevent your wardrobe from growing indefinitely.
Put Clothes Away Immediately
Don’t leave clean clothes on the bed, chair, or floor.
As soon as laundry is folded or dried, return it to its designated location.
The easier your system is, the easier this habit becomes.
Reset Your Closet for Five Minutes
Spend five minutes at the end of the week returning things to their proper places.
Check:
- Hangers
- Drawers
- Shoes
- Accessories
- Floor
- Storage boxes
Five minutes of maintenance can prevent a much bigger organizing project later.
Create a Monthly Closet Reset
Once a month, take a few minutes to review your closet.
Ask:
- What haven’t I worn?
- What no longer fits?
- What needs repair?
- What should be donated?
- What needs seasonal storage?
- Is anything becoming difficult to find?
This keeps your closet from gradually becoming overcrowded.
How to Prevent Closet Clutter From Returning
The best organization system is one you can maintain.
Follow these simple rules:
Rule 1: Everything needs a home
If you don’t know where something belongs, the system needs improvement.
Rule 2: Don’t overfill storage
Drawers and shelves should remain easy to use.
Rule 3: Control new purchases
Before buying something, ask where you’ll store it.
Rule 4: Review your wardrobe regularly
Don’t wait until the closet becomes impossible to manage.
Rule 5: Make the easy choice the organized choice
Keep storage solutions convenient.
If putting something away takes 30 seconds every time, you’re less likely to do it.
Common Closet Organization Mistakes
Buying Too Many Organizers
Storage products can’t solve an excess of possessions.
Declutter first.
Keeping Clothes That Don’t Fit
If you’re keeping something for a future version of yourself, consider whether it deserves valuable closet space now.
Overcrowding the Hanging Rod
A crowded rod makes every item harder to see and use.
Ignoring Vertical Space
High shelves and doors can provide valuable storage.
Mixing Everything Together
Shoes, clothing, accessories, and bags should have clear zones.
Making the System Too Complicated
If your organization system requires too many steps, you’re less likely to maintain it.
Simple systems usually win.
The 15-Minute Closet Reset
Need a quick refresh?
Set a timer for 15 minutes.
Minutes 1–3
Pick up anything on the floor.
Minutes 4–6
Return clothing to the correct categories.
Minutes 7–9
Straighten drawers and shelves.
Minutes 10–12
Pair and organize shoes.
Minutes 13–15
Remove anything that clearly doesn’t belong.
Repeat this once or twice a week and your closet can stay surprisingly manageable.
Frequently Asked Questions
What is the best way to organize a closet?
Start by decluttering, then group similar items together and create designated zones for clothing, shoes, accessories, and seasonal items.
Should I organize my closet by color or category?
Category should usually come first because it makes items easier to find. You can then arrange each category by color if you prefer.
How do I organize a small closet with too many clothes?
Declutter first, rotate seasonal clothing, use slim hangers, maximize vertical space, and store occasional items outside the main closet when possible.
How often should I declutter my closet?
A small monthly review is useful, while a more thorough seasonal review can help remove clothing you no longer wear or need.
Are closet organizers worth buying?
They can be, but only after you’ve decluttered. Choose organizers that solve a specific storage problem rather than buying products simply because they look useful.
How do I stop my closet from getting messy?
Give every item a designated home, put clothing away immediately, avoid overfilling storage, and perform short weekly resets.
Final Verdict
The secret to an organized closet isn’t having the biggest wardrobe or the most expensive storage system.
It’s creating a simple system that matches the way you actually live.
Start by removing what you don’t need. Then group similar items together, use your available space intelligently, and keep frequently used clothing easy to reach.
Most importantly, don’t try to maintain perfection.
A five-minute reset, regular decluttering, and thoughtful shopping habits can prevent your closet from returning to chaos.
The Bottom Line
Declutter first, organize by category, maximize your available space, and make putting things away effortless.
When every item has a home, maintaining an organized closet becomes a routine rather than a chore.