
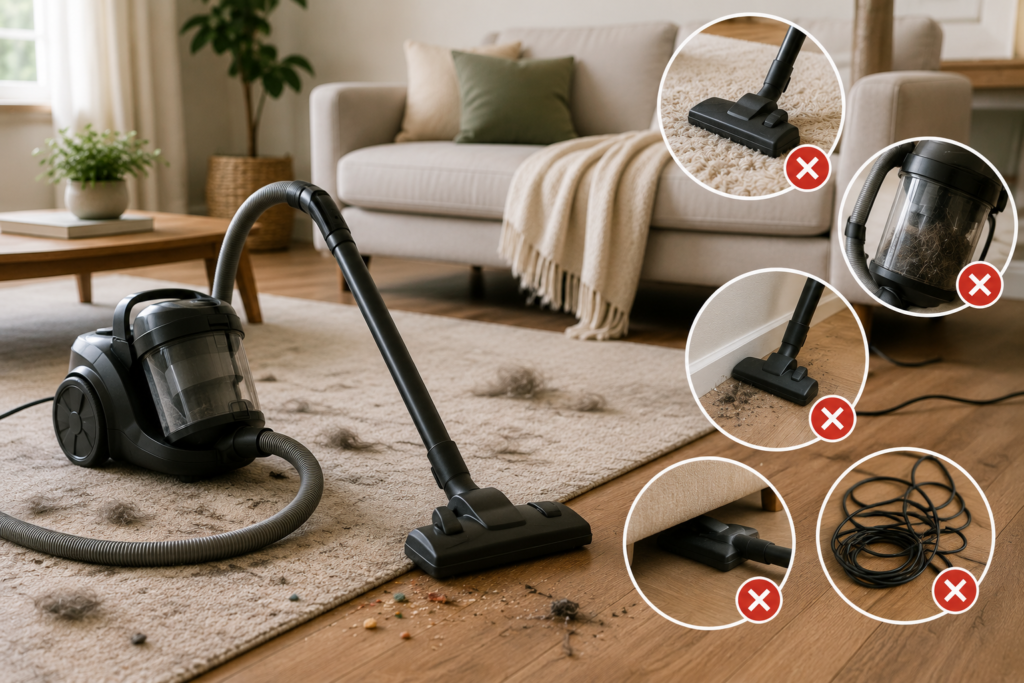
Vacuuming seems simple: turn on the vacuum, move it across the floor, and you’re done.
But if you’re spending a lot of time vacuuming without getting the results you expect, the problem may not be your vacuum cleaner.
It could be how you’re using it.
From vacuuming too quickly to ignoring filters and failing to empty the dust container, a few common mistakes can make cleaning less effective and put unnecessary strain on your machine.
The good news is that these mistakes are easy to fix.
In this guide, we’ll cover five common vacuuming mistakes, explain why they make cleaning harder, and show you exactly what to do instead.
Quick Overview: 5 Vacuuming Mistakes
| Mistake | Why It Causes Problems | Better Approach |
|---|---|---|
| Vacuuming too quickly | Misses dirt and debris | Move slowly |
| Skipping regular maintenance | Reduces performance | Clean filters and brushes |
| Using the wrong setting | Can reduce cleaning effectiveness | Match settings to flooring |
| Vacuuming over clutter | Wastes time and can damage the machine | Clear the floor first |
| Waiting until the floor looks dirty | Allows buildup | Vacuum regularly |
1. Vacuuming Too Quickly
One of the most common vacuuming mistakes is moving the vacuum too fast.
It may feel like you’re saving time, but rushing can mean the vacuum doesn’t have enough time to pick up dust, hair, crumbs, and other debris.
This is especially noticeable on carpets.
Why It Makes Cleaning Harder
A quick pass may leave behind debris that requires you to vacuum the same area again later.
So the time you think you’re saving can actually become extra work.
How to Fix It
Step 1: Move the vacuum slowly across the floor.
Step 2: Make controlled passes instead of rushing.
Step 3: Pay extra attention to high-traffic areas.
Step 4: Make overlapping passes when necessary.
Step 5: Move the vacuum at a steady pace.
Hot Picks Tip
Think of vacuuming as collecting dirt efficiently, not simply moving the machine across the floor.
A slower, deliberate pass can often be more effective than several rushed passes.
2. Ignoring the Vacuum’s Filter and Brush
Even a good vacuum cleaner can perform poorly if you don’t maintain it.
Filters, brush rolls, dust containers, and other components can become clogged with dust, hair, and debris.
When that happens, the vacuum may not work as efficiently as it should.
Signs Your Vacuum May Need Maintenance
You might notice:
- Reduced suction
- Unusual smells
- Excessive noise
- Dust being left behind
- A brush roll that isn’t spinning properly
- The vacuum overheating or shutting down
How to Maintain Your Vacuum
Step 1: Check the manufacturer’s instructions.
Step 2: Empty the dust container when necessary.
Step 3: Inspect the filter.
Step 4: Clean or replace the filter according to the manufacturer’s instructions.
Step 5: Check the brush roll for hair and tangled debris.
Step 6: Remove debris when appropriate.
Step 7: Check hoses and attachments for blockages.
Regular maintenance can help your vacuum maintain its performance and may extend its useful life.
Important
Don’t wash a filter unless the manufacturer specifically says it is washable.
Some filters must be replaced rather than cleaned.
3. Using the Wrong Vacuum Setting
Many modern vacuum cleaners have different settings or floor-height adjustments.
Using the wrong setting can make cleaning less effective.
For example, a vacuum designed to work across different floor types may require different adjustments for carpet and hard flooring.
How to Fix It
Before vacuuming:
Step 1: Identify the flooring you’re cleaning.
Step 2: Check your vacuum’s recommended setting.
Step 3: Adjust the floor-height or suction setting if your model provides one.
Step 4: Use the appropriate attachment when necessary.
Step 5: Test the vacuum on a small area.
Different Floors Need Different Approaches
Carpet
Use the carpet setting or brush roll recommended by your vacuum manufacturer.
Hard Floors
Some vacuums allow you to disable the rotating brush to reduce the risk of scratching or scattering debris.
Rugs
Use the setting recommended for the specific rug material.
Always follow the manufacturer’s recommendations for both the vacuum and the flooring.
4. Vacuuming Over Clutter
Vacuuming around objects is frustrating and inefficient.
If your floor is covered with toys, clothing, cables, shoes, and other items, you’ll spend more time stopping and starting than actually vacuuming.
There’s also a risk of accidentally sucking up something that shouldn’t go into the vacuum.
What to Do Instead
Spend a few minutes preparing the room.
Step-by-Step
Step 1: Pick up clothing.
Step 2: Remove toys and small objects.
Step 3: Move lightweight furniture where practical.
Step 4: Check for cables and small items.
Step 5: Empty obvious debris that shouldn’t be vacuumed.
Step 6: Start vacuuming once the floor is clear.
The “Floor First” Rule
Before vacuuming, ask:
“Is there anything on this floor that shouldn’t be here?”
If the answer is yes, clear it first.
This makes the actual vacuuming much faster.
5. Waiting Until the Floor Looks Dirty
You don’t always need to wait until you can visibly see dust and debris.
Small particles can accumulate before they’re obvious.
Regular vacuuming can prevent buildup and make each cleaning session easier.
How Often Should You Vacuum?
There’s no single schedule that works for every home.
Your ideal frequency depends on:
- Number of people in the household
- Pets
- Children
- Flooring type
- Indoor traffic
- Dust levels
- Allergies and personal preferences
A Practical Starting Point
High-traffic areas: Several times per week
Bedrooms: About once or twice per week
Living areas: Several times per week or weekly
Low-traffic areas: Weekly or as needed
Homes with pets: Potentially more frequently
The goal is to create a routine that prevents excessive buildup.
How to Vacuum Properly: A Simple Step-by-Step Routine
Now that we’ve covered the mistakes, here’s a better way to approach vacuuming.
Step 1: Declutter the Floor
Remove objects that could interfere with cleaning.
Step 2: Choose the Correct Setting
Adjust the vacuum according to the flooring and manufacturer’s instructions.
Step 3: Start at the Edges
Use the appropriate attachment to clean along baseboards and corners where practical.
Step 4: Work Systematically
Move through the room in an organized pattern instead of randomly jumping between areas.
Step 5: Move Slowly
Give the vacuum enough time to pick up debris.
Step 6: Overlap Your Passes
Slightly overlap each pass to avoid leaving narrow strips untouched.
Step 7: Focus on High-Traffic Areas
Spend extra time where dirt accumulates most quickly.
Step 8: Clean the Vacuum Afterward
Empty the dust container and check the brush and filter according to the manufacturer’s instructions.
How to Make Vacuuming Faster
Vacuuming doesn’t have to take forever.
The key is to reduce unnecessary work.
1. Keep the floor clear
Less clutter means fewer interruptions.
2. Use the right attachment
Different tools are designed for different surfaces and spaces.
3. Create a routine
Regular vacuuming prevents heavy buildup.
4. Maintain your vacuum
A well-maintained vacuum can work more effectively.
5. Vacuum strategically
Focus on high-traffic areas instead of treating every part of your home exactly the same.
Vacuum Attachments You Should Actually Use
Many people have several vacuum attachments but rarely use them.
Learning what each tool does can make cleaning easier.
Crevice Tool
Best for:
- Corners
- Narrow gaps
- Along furniture edges
- Around appliances
Upholstery Tool
Best for:
- Sofas
- Chairs
- Fabric furniture
Always check the manufacturer’s recommendations before vacuuming delicate materials.
Dusting Brush
Best for:
- Shelves
- Blinds
- Delicate surfaces
- Certain electronics when appropriate
Motorized Brush
Best for:
- Carpets
- Rugs
- Pet hair
Use it only on surfaces approved by the manufacturer.
What About Robot Vacuums?
Robot vacuums can be useful for maintaining floors between deeper cleaning sessions.
They are particularly convenient for:
- Hard floors
- Open floor plans
- Daily dust and debris
- Pet-hair maintenance
- Busy households
However, they don’t completely replace manual cleaning.
You’ll still need to:
- Empty the dustbin
- Clean the brushes
- Maintain filters
- Clean corners and edges
- Vacuum stairs and other areas the robot cannot reach
Best Strategy
Think of a robot vacuum as a maintenance tool, rather than a complete replacement for your main vacuum cleaner.
What About Cordless Vacuums?
Cordless vacuums are particularly useful for quick cleaning.
Their main advantage is convenience.
You can grab one quickly without:
- Finding an outlet
- Unwinding a cord
- Moving the plug between rooms
They’re useful for:
- Kitchen crumbs
- Entryways
- Stairs
- Quick daily cleaning
- Small apartments
For larger homes, however, battery capacity and dustbin size are important factors to consider.
How to Choose the Right Vacuum for Your Home
If you’re considering replacing your vacuum, don’t focus only on the highest suction number or the newest features.
Think about your actual cleaning needs.
Consider:
Floor type
Mostly carpet? Hard flooring? A combination?
Home size
A small cordless vacuum may be enough for an apartment, while a larger home may benefit from a bigger-capacity model.
Pets
Look for features designed to handle hair if you have shedding pets.
Storage
Consider whether the vacuum is easy to store.
Weight
Important if you’ll carry it between floors.
Battery life
Especially important for cordless models.
Maintenance
Check how easy it is to clean filters, brushes, and dust containers.
Common Vacuuming Mistakes to Avoid
Here’s a quick checklist:
Don’t rush through rooms.
Don’t ignore the filter.
Don’t let hair build up around the brush roll.
Don’t vacuum without checking the floor first.
Don’t use an inappropriate floor setting.
Don’t wait until every floor is visibly dirty.
Don’t ignore unusual smells or changes in performance.
Don’t forget corners and edges.
Don’t use attachments on surfaces they’re not designed for.
Frequently Asked Questions
How often should I vacuum my house?
High-traffic areas may need vacuuming several times a week, while low-traffic rooms may only need weekly cleaning. Homes with pets or children may require more frequent vacuuming.
Is it better to vacuum slowly?
Yes. Moving the vacuum slowly and making controlled passes can help it pick up more debris than rushing through the room.
Why isn’t my vacuum picking up dirt?
Possible causes include a full dust container, clogged filter, blocked hose, tangled brush roll, incorrect setting, or normal wear. Check the manufacturer’s troubleshooting instructions.
How often should I clean my vacuum filter?
Follow the manufacturer’s instructions. Some filters can be cleaned, while others need to be replaced periodically.
Should I vacuum before or after dusting?
Generally, dust first and vacuum afterward. Dust that falls from furniture and shelves can then be collected from the floor.
Can I vacuum every day?
For most homes, daily vacuuming isn’t necessary everywhere. However, quick daily vacuuming of high-traffic areas can be useful.
Are robot vacuums worth it?
They can be worthwhile if you value automated daily floor maintenance. They are best viewed as a supplement to regular manual cleaning rather than a complete replacement.
Final Verdict
Vacuuming shouldn’t be difficult.
If you’re constantly going over the same areas, struggling with poor suction, or spending too much time cleaning floors, check your technique before replacing your vacuum.
The biggest improvements often come from simple changes:
Slow down.
Clear the floor first.
Use the correct setting.
Maintain your vacuum.
Vacuum regularly instead of waiting for visible dirt.
Once these habits become part of your routine, you’ll spend less time fighting with your vacuum and more time enjoying a cleaner home.
And if your current vacuum still makes cleaning harder than it should, that’s when it may be worth looking at a model designed specifically for your flooring, home size, and cleaning needs.