
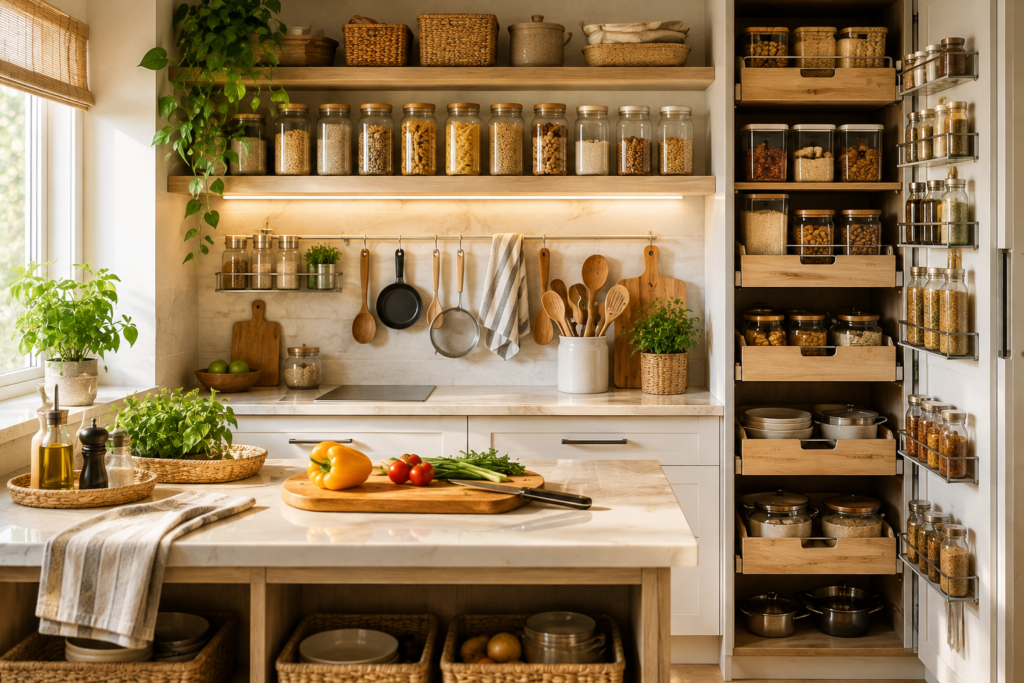
A well-organized kitchen isn’t just about making your cabinets look neat.
It’s about creating a space where everything you need is easy to find, easy to reach, and easy to put away.
When your knives are close to your cutting board, your cooking utensils are near the stove, and your everyday ingredients are easy to access, cooking becomes faster and less frustrating.
The good news is that you don’t need a large kitchen or an expensive renovation to make a difference.
With the right approach, you can reorganize almost any kitchen using the space you already have.
In this guide, we’ll show you how to organize your kitchen step by step, from decluttering and creating functional zones to organizing cabinets, drawers, countertops, pantry items, and cooking tools.
The Simple Kitchen Organization Formula
Before you start moving everything around, remember this simple principle:
Store things where you use them.
Your kitchen should follow the way you actually cook.
For example:
- Knives → near your preparation area
- Pots and pans → near the stove
- Plates → near the dishwasher or dining area
- Coffee equipment → near your coffee station
- Spices → near your cooking area
- Food containers → near the refrigerator
This simple approach can eliminate unnecessary movement and make everyday cooking much easier.
Step 1: Empty and Declutter Your Kitchen
Don’t start by buying storage containers.
Start by removing things you don’t need.
Take everything out of:
- Kitchen drawers
- Cabinets
- Pantry shelves
- Countertop storage
- Under-sink storage
You don’t necessarily have to empty the entire kitchen at once. Work one area at a time if that feels more manageable.
Create four groups
As you remove items, sort them into:
Keep
Items you use regularly.
Move
Items that belong somewhere else in the kitchen.
Donate
Useful items you no longer need.
Discard
Broken, damaged, or unusable items.
Ask yourself:
“When was the last time I used this?”
If you haven’t used something for years and don’t have a specific reason to keep it, it may be taking up valuable space.
Step 2: Identify Your Kitchen’s Main Work Zones
One of the best kitchen organization ideas is to divide the kitchen into functional zones.
Instead of organizing everything by appearance, organize it according to the tasks you perform.
The five most useful zones are:
1. Preparation Zone
For:
- Knives
- Cutting boards
- Mixing bowls
- Measuring tools
- Peelers
- Graters
2. Cooking Zone
For:
- Pots
- Pans
- Tongs
- Spatulas
- Wooden spoons
- Cooking oils
- Everyday seasonings
3. Cleaning Zone
For:
- Dish soap
- Sponges
- Dishwasher supplies
- Cleaning cloths
- Trash bags
4. Food Storage Zone
For:
- Food containers
- Plastic wrap
- Foil
- Storage bags
5. Beverage Zone
For:
- Coffee maker
- Coffee beans
- Kettle
- Tea
- Mugs
- Cups
You don’t need a huge kitchen to create these zones.
You simply need to group related items together.
Step 3: Organize Your Most-Used Items First
Not everything in your kitchen deserves equal access.
Your most frequently used items should be the easiest to reach.
Keep everyday items accessible:
- Chef’s knife
- Cutting board
- Favorite frying pan
- Cooking utensils
- Measuring spoons
- Coffee equipment
- Everyday plates and glasses
Move less-used items elsewhere:
- Special baking equipment
- Large serving dishes
- Holiday cookware
- Specialty gadgets
- Extra appliances
A simple rule works well:
The more frequently you use something, the easier it should be to access.
Step 4: Create a Practical Prep Station
Your food preparation area should be one of the most organized areas in the kitchen.
Ideally, you want everything needed for basic preparation close together.
Keep nearby:
- Chef’s knife
- Cutting board
- Vegetable peeler
- Grater
- Measuring tools
- Mixing bowls
- Kitchen shears
How to organize it
Step 1: Choose your main preparation surface.
Step 2: Place your cutting board nearby.
Step 3: Store frequently used knives within easy reach.
Step 4: Group preparation tools together in a drawer or container.
Step 5: Keep mixing bowls in an accessible cabinet.
The goal is to create a mini preparation station rather than making yourself search through several cabinets.
Step 5: Organize the Cooking Area
The area around your stove should contain the tools you use while cooking.
Keep nearby:
- Tongs
- Spatulas
- Wooden spoons
- Ladles
- Oven mitts
- Frequently used pots
- Frying pans
- Cooking oils
What shouldn’t be there?
Try not to overcrowd the area with tools you rarely use.
A crowded cooking zone makes it harder to clean and can reduce your available workspace.
Hot Picks Tip
A simple utensil holder can work well for your most-used cooking utensils, but don’t fill it with every tool you own.
Keep only the tools you regularly reach for.
Step 6: Organize Your Kitchen Drawers
Kitchen drawers can become cluttered very quickly.
The solution is to give each drawer a specific purpose.
Example drawer system
Drawer 1: Everyday utensils
Drawer 2: Measuring tools
Drawer 3: Kitchen gadgets
Drawer 4: Food-storage accessories
Drawer 5: Kitchen linens
Use drawer dividers
Drawer dividers can prevent utensils from becoming mixed together.
They are particularly useful for:
- Measuring spoons
- Knives
- Spatulas
- Tongs
- Small kitchen tools
Important
Don’t organize a drawer around how it looks.
Organize it around how you use it.
Step 7: Make Your Cabinets Work Harder
Deep cabinets can easily become black holes where items disappear.
Instead of stacking everything randomly, group similar items together.
For example:
Cabinet 1: Plates and bowls
Cabinet 2: Glasses and mugs
Cabinet 3: Pots and pans
Cabinet 4: Baking equipment
Cabinet 5: Food-storage containers
Helpful storage solutions
Consider:
- Shelf risers
- Pull-out organizers
- Stackable shelves
- Cabinet organizers
- Lazy Susans
You don’t need all of these.
Choose the solution that addresses a specific problem.
Step 8: Organize Pots and Pans
Pots and pans can take up a surprising amount of cabinet space.
If they’re simply stacked together, getting the pan you need can become frustrating.
Better options
Option 1: Stack them
Place larger cookware underneath smaller pieces.
Option 2: Use a vertical organizer
Store baking sheets and pans vertically when your cabinet layout allows it.
Option 3: Use a hanging system
If your kitchen has suitable wall space, frequently used pans can be stored on a secure rack.
Best practice
Keep your most-used pan and pot easiest to access.
There’s no reason to dig through six pans to reach the one you use every day.
Step 9: Organize Your Pantry by Category
A pantry becomes much easier to use when similar ingredients are grouped together.
Try these categories:
Dry staples
- Rice
- Pasta
- Flour
- Sugar
- Grains
Canned foods
- Tomatoes
- Beans
- Vegetables
- Soups
Breakfast
- Cereal
- Oats
- Spreads
Snacks
- Crackers
- Nuts
- Dried fruit
Baking
- Flour
- Baking powder
- Chocolate
- Decorating supplies
Cooking ingredients
- Stock
- Sauces
- Vinegar
- Oils
The key rule
Group similar things together.
This makes it much easier to see what you have before going grocery shopping.
Step 10: Put Frequently Used Ingredients at Eye Level
Not all pantry ingredients need equal access.
Place the ingredients you use regularly in the easiest-to-reach locations.
Eye-level storage is ideal for:
- Rice
- Pasta
- Flour
- Cooking oils
- Coffee
- Everyday spices
- Breakfast foods
Less frequently used ingredients can go on higher or lower shelves.
This simple change can save time every time you cook.
Step 11: Organize Your Spice Collection
Spices are small, but they can create a surprisingly messy cabinet.
If you’re constantly searching through bottles to find paprika or cumin, it’s time to reorganize.
Start by removing:
- Expired spices
- Duplicate bottles
- Spices you never use
Then group them by type.
Possible categories:
Everyday seasonings
- Salt
- Black pepper
- Garlic powder
- Paprika
Herbs
- Oregano
- Basil
- Thyme
- Rosemary
Spices
- Cumin
- Turmeric
- Cinnamon
- Chili powder
Storage options
You can use:
- Spice racks
- Drawer organizers
- Tiered shelves
- Pull-out spice organizers
Choose the system that works with your kitchen layout.
Step 12: Create a Dedicated Coffee Station
If you drink coffee every day, creating a small coffee station can make your morning routine much easier.
Keep together:
- Coffee maker
- Grinder
- Coffee beans
- Filters
- Mugs
- Kettle
- Measuring spoon or scale
How to set it up
Step 1: Choose a convenient countertop area.
Step 2: Place the coffee maker there.
Step 3: Store beans and brewing equipment nearby.
Step 4: Keep mugs within easy reach.
Step 5: Store filters and accessories together.
This is particularly useful if you regularly make pour-over coffee, French press, or espresso.
Step 13: Organize Your Refrigerator
Kitchen organization doesn’t stop at cabinets.
A well-organized refrigerator can make meal preparation much easier.
Group similar foods together
For example:
Top shelves: Ready-to-eat foods
Middle shelves: Dairy and everyday items
Lower shelves: Raw ingredients that require careful storage
Drawers: Fruits and vegetables according to your refrigerator’s design
Door shelves: Condiments and suitable items
Always follow your refrigerator manufacturer’s recommendations and food-safety guidance for proper storage.
Keep a “use first” area
Place foods that need to be consumed soon where you’ll see them.
This can help reduce food waste.
Step 14: Give Food Containers a Permanent Home
Food-storage containers are notorious for taking over kitchen cabinets.
The solution is simple:
Give them their own area.
Better organization
Step 1: Match containers with their lids.
Step 2: Remove damaged or missing pieces.
Step 3: Stack containers by size.
Step 4: Store lids vertically when possible.
Step 5: Keep the entire collection in one designated area.
Hot Picks Tip
Avoid keeping dozens of containers “just in case.”
A smaller collection that is easy to organize is often much more useful.
Step 15: Control Your Countertops
Countertops are valuable working space.
Don’t automatically use them as storage.
Keep out only what you use regularly
Good candidates include:
- Coffee maker
- Toaster
- Frequently used appliance
- Knife block
- Fruit bowl
Everything else should have a designated storage location if possible.
The goal
Your countertop should be:
Functional first. Decorative second.
You want enough clear space to comfortably prepare food.
Step 16: Create an Appliance Strategy
Small kitchen appliances can quickly overwhelm your available storage.
Before leaving an appliance on the counter, ask:
“Do I use this several times a week?”
If yes, keeping it accessible may make sense.
If you use it only occasionally, consider storing it in a cabinet or pantry.
Examples
Keep accessible:
- Coffee maker
- Air fryer
- Toaster
Store away:
- Ice cream maker
- Stand mixer
- Specialty appliances
Of course, this depends on how frequently you personally use each appliance.
Step 17: Make Your Sink Area Efficient
The sink area should be simple and easy to clean.
Keep nearby:
- Dish soap
- Sponge
- Dish brush
- Kitchen towels
- Dishwasher supplies
Avoid:
- Excessive cleaning products
- Unused bottles
- Clutter around the sink
A small tray can help keep cleaning products contained and make wiping the countertop easier.
Step 18: Organize Under the Sink
The cabinet under the sink is often wasted space.
Use it for items that make sense in that location.
Good candidates:
- Cleaning products
- Dishwasher supplies
- Trash bags
- Extra sponges
- Cleaning cloths
Helpful solutions
Try:
- Stackable bins
- Pull-out organizers
- Small baskets
- Door-mounted organizers
Always store cleaning products safely and separately from food and food-preparation items.
Step 19: Create a Kitchen “Reset” Routine
Even the most organized kitchen will become messy during cooking.
The secret is to reset it regularly.
Try a 5-minute reset every evening
Minute 1: Put ingredients away.
Minute 2: Load or wash dishes.
Minute 3: Wipe countertops.
Minute 4: Return cooking tools to their storage areas.
Minute 5: Check the sink and floor for obvious messes.
Five minutes every day can prevent a much larger cleanup later.
A Simple Kitchen Organization Checklist
Use this checklist when organizing your kitchen:
Decluttering
Remove unused items
Discard damaged tools
Donate things you don’t need
Remove duplicates
Preparation
Create a prep zone
Keep knives nearby
Organize cutting boards
Group mixing bowls
Cooking
Organize pots and pans
Keep everyday utensils accessible
Store cooking oils nearby
Organize everyday spices
Storage
Group pantry items
Organize food containers
Label storage where useful
Keep frequently used items accessible
Countertops
Remove unnecessary appliances
Create clear preparation space
Keep frequently used appliances accessible
Maintenance
Clean as you cook
Reset the kitchen daily
Review clutter regularly
Kitchen Organization Mistakes to Avoid
1. Buying storage before decluttering
Storage products can’t solve the problem of having too many things.
Declutter first.
2. Organizing only for appearance
A beautiful kitchen isn’t useful if you can’t easily find anything.
3. Keeping everything on the countertop
Countertop clutter reduces your available cooking space.
4. Storing frequently used items too far away
Your everyday tools should be easy to reach.
5. Creating overly complicated systems
If an organization system takes too much effort to maintain, you’ll eventually stop using it.
6. Ignoring your cooking habits
Your kitchen should be organized around your routine, not someone else’s kitchen.
Best Kitchen Organization Products to Consider
You don’t need to buy everything on this list.
Choose products that solve a specific storage problem.
Drawer Dividers
Best for: Utensils and small tools.
Shelf Risers
Best for: Creating extra vertical storage inside cabinets.
Lazy Susan
Best for: Oils, sauces, and pantry items.
Pull-Out Cabinet Organizer
Best for: Deep cabinets.
Food Storage Container Organizer
Best for: Keeping lids and containers together.
Spice Organizer
Best for: Making small spice bottles easier to see.
Under-Sink Bins
Best for: Cleaning supplies.
Stackable Pantry Bins
Best for: Grouping similar ingredients.
The best storage solution is the one that makes a specific part of your kitchen easier to use.
How to Organize a Small Kitchen
If you’re working with limited space, organization becomes even more important.
Use vertical space
Install shelves, hooks, or other suitable storage solutions to use wall space.
Choose multipurpose tools
A tool that performs several jobs can be more valuable than several single-purpose gadgets.
Keep countertops clear
Your countertop is one of your most valuable working surfaces.
Use nesting cookware
Pots, pans, and bowls that fit inside one another can save cabinet space.
Store things according to frequency
Don’t give premium storage space to items you rarely use.
How Long Does It Take to Organize a Kitchen?
You don’t need to finish everything in one day.
A simple approach is to divide the kitchen into sections.
Day 1
Declutter drawers.
Day 2
Organize cabinets.
Day 3
Reorganize pantry.
Day 4
Organize refrigerator.
Day 5
Tackle countertops and appliances.
Day 6
Create cooking and preparation zones.
Day 7
Fine-tune the system.
Alternatively, you can complete the process in one afternoon if your kitchen is small.
The important thing isn’t speed.
It’s creating a system you can maintain.
Frequently Asked Questions
What is the best way to organize a kitchen?
Start by decluttering, then divide the kitchen into functional zones. Store frequently used items close to where you use them and group similar items together.
Where should I keep cooking utensils?
Keep frequently used cooking utensils close to the stove or main cooking area. A drawer, utensil holder, or suitable organizer can work well.
How should I organize a small kitchen?
Use vertical space, choose multipurpose tools, keep countertops clear, use stackable storage, and prioritize easy access for frequently used items.
How do I organize kitchen cabinets?
Group similar items together and use shelf risers, pull-out organizers, or other storage solutions when they solve a specific problem.
How can I keep my kitchen organized?
Give everything a permanent home, put items away after using them, clean as you cook, and perform a quick kitchen reset each day.
Should kitchen appliances stay on the countertop?
Keep appliances on the counter if you use them frequently and have enough space. Store less frequently used appliances away to preserve working space.
How can I organize kitchen drawers?
Give each drawer a specific purpose and use dividers to separate utensils and small tools.
Final Verdict
The best organized kitchen isn’t necessarily the one with the most storage.
It’s the one where everything has a logical place.
Start by removing things you don’t use. Then create simple preparation, cooking, cleaning, storage, and beverage zones. Keep everyday tools within easy reach, organize cabinets and drawers by function, and protect your countertop space.
Most importantly, avoid creating an organization system that is difficult to maintain.
Your kitchen should make cooking easier—not give you another chore to manage.
Start small.
Organize one drawer. Then one cabinet. Then your cooking area.
Before long, you’ll have a kitchen that feels less cluttered, more efficient, and much easier to cook in every day.